Getting started
Sign in
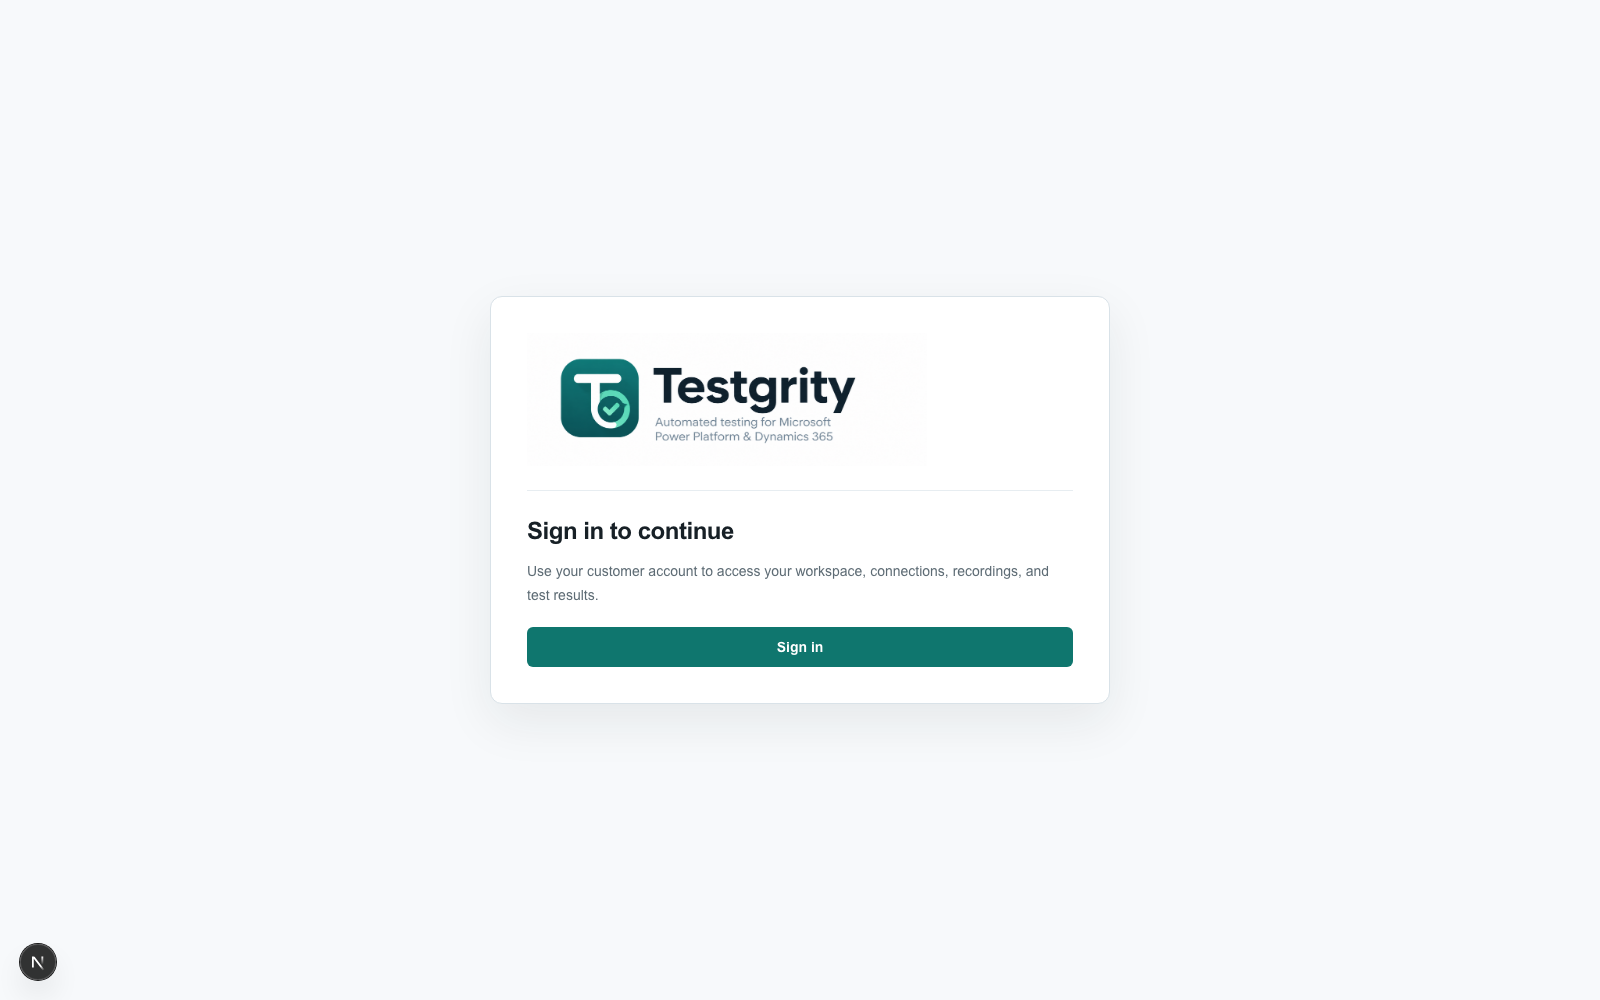
Open the Testgrity URL supplied by your administrator. If authentication is enabled, select Sign in and complete the Microsoft customer account sign-in or registration process. Select Read the User Manual if you need guidance before signing in.
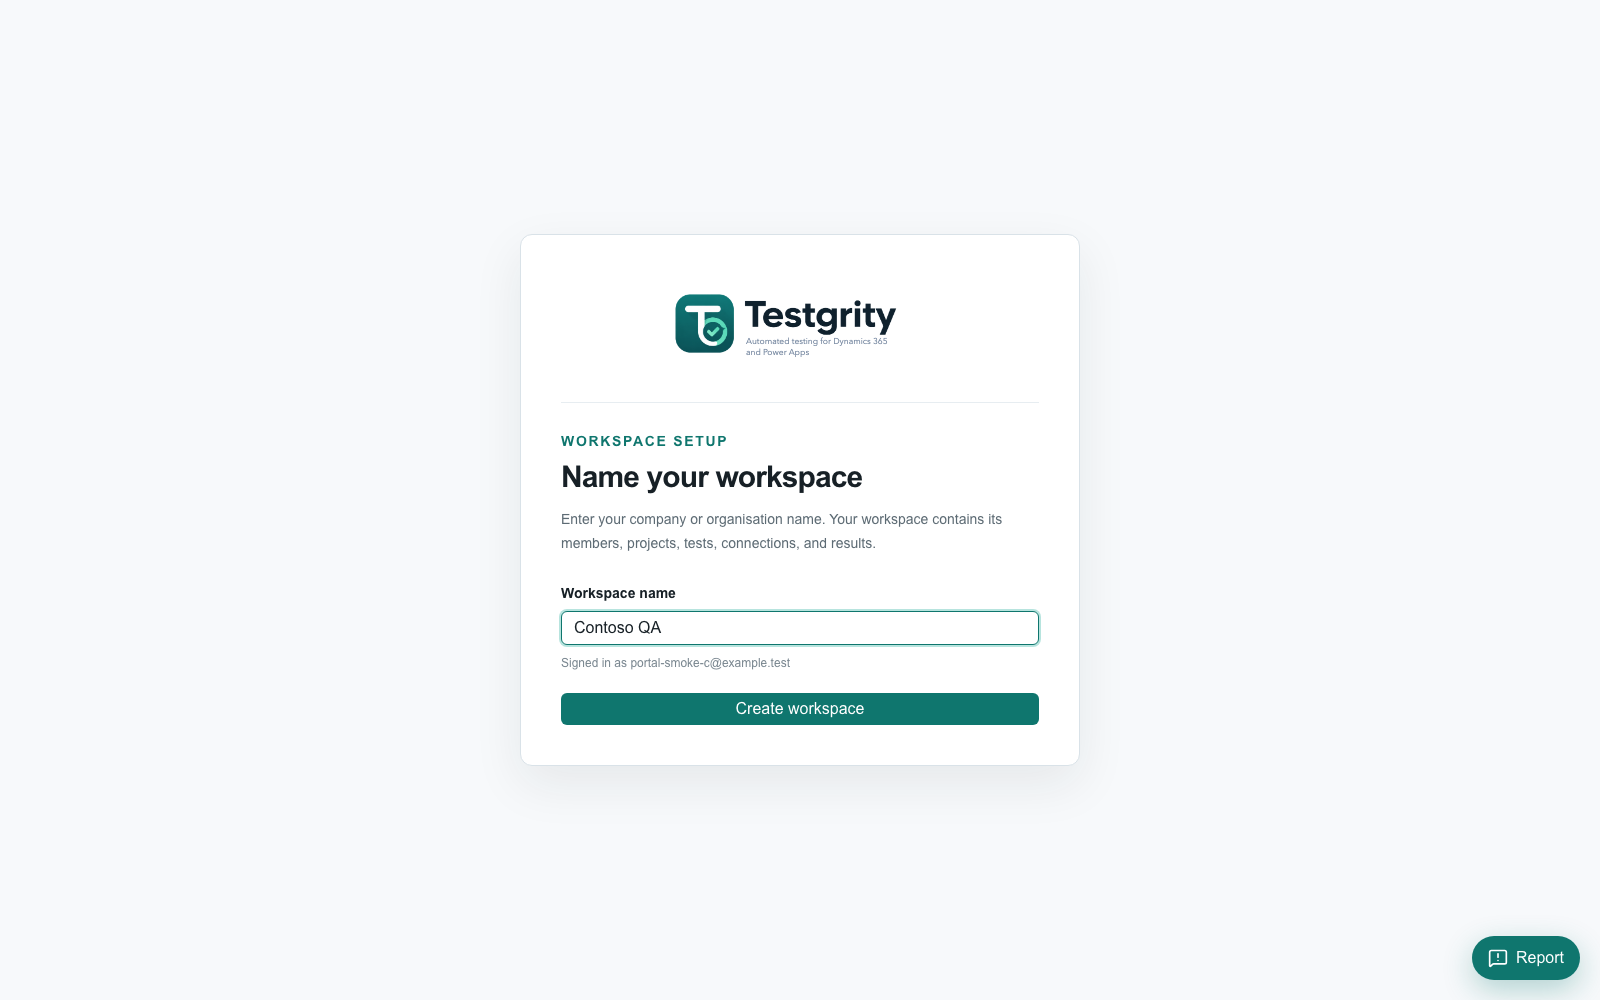
During registration, you may be asked to provide your name, company, and job title. You must also accept the Testgrity Terms and Conditions and Privacy Policy and acknowledge that Testgrity is a private beta. Testgrity then asks you to name your workspace using your company or organisation name. This name identifies the organisation that owns its projects, tests, connections, runs, settings, and API tokens. Each user can currently belong to one workspace.
Registration creates an account but does not grant workspace access. A Testgrity administrator must approve the account, and Testgrity sends an email when access is ready. Automated tests can change or delete data in a connected environment, so use an appropriate test environment and test data.
After registration and legal acceptance, an account that has not yet been approved opens Beta access pending. You can review the legal documents or contact support from that page. When the approval email arrives, sign out and sign in again so Microsoft can issue a fresh identity token containing the beta access role.
If the current legal documents have not been accepted for your account, Testgrity opens Legal acceptance before the workspace. Review the linked documents in a new tab, select both required checkboxes, and select Accept and continue. You may be asked to accept again when the documents change. If an existing session predates legal acceptance tracking, follow the prompt to sign out and sign in again first.
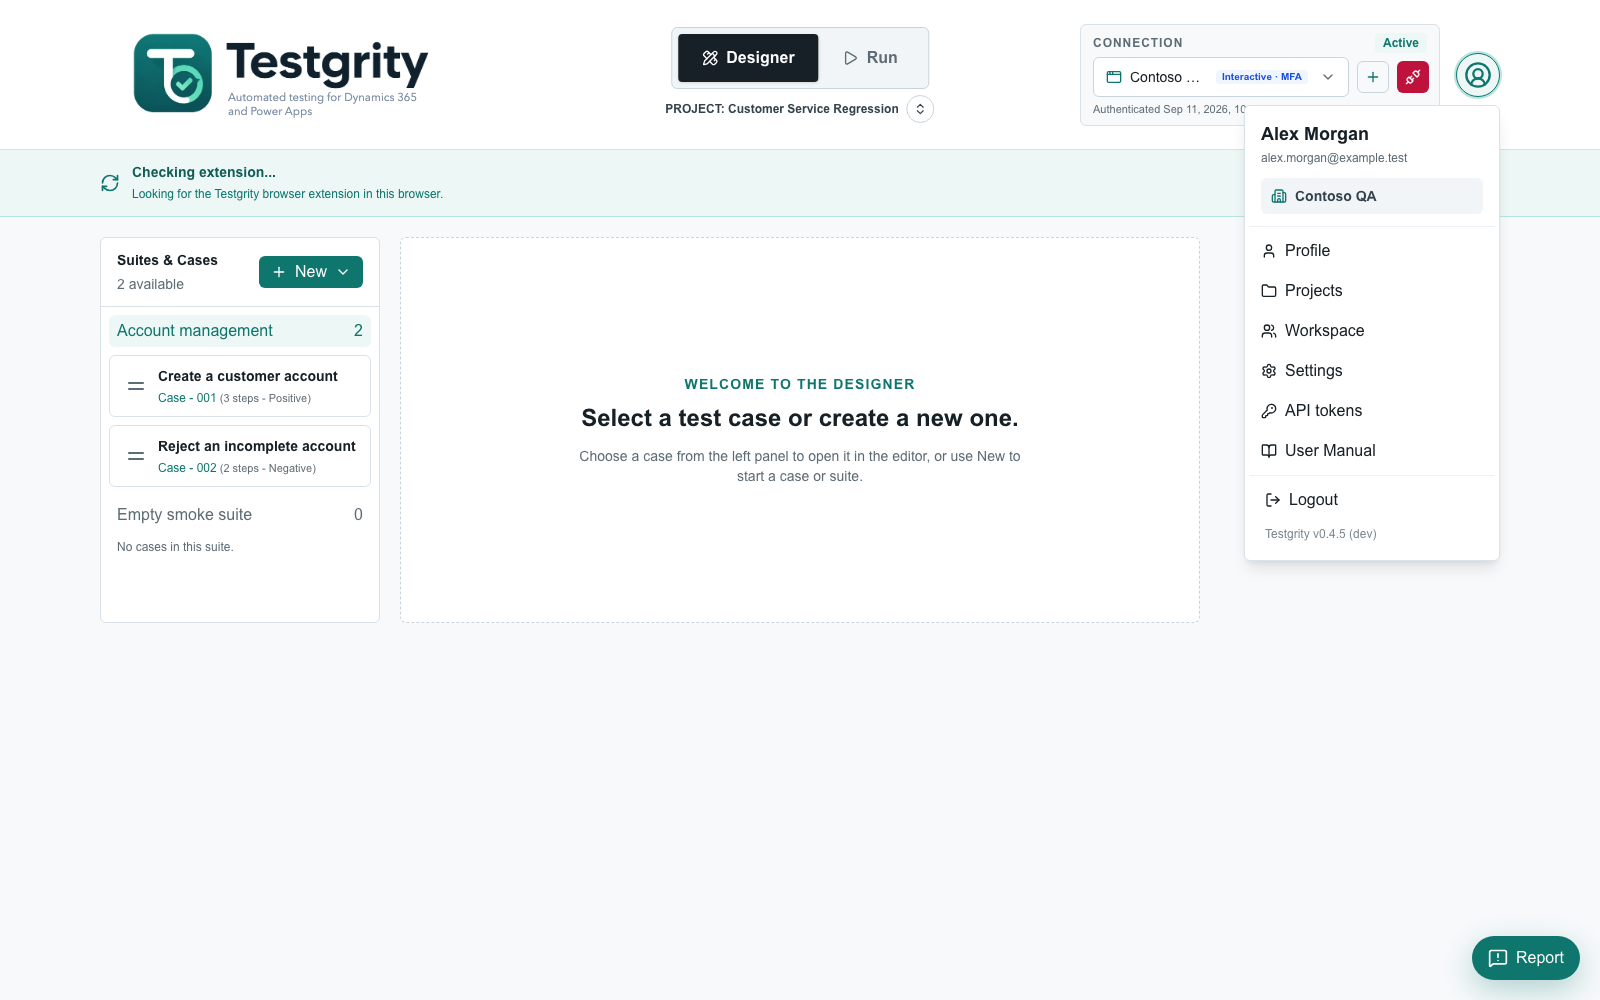
After sign-in, the header provides:
- Designer — the pencil-and-ruler tab used to create and maintain suites and test cases.
- Run — the play tab used to execute suites and review suite logs.
- Active project — the project name below the Designer and Run tabs. Select the round switch button beside it to open Projects.
- Connection — choose the environment used by test runs.
- Profile menu — open Profile, Projects, Workspace, Settings, API tokens, or the User Manual, or log out.
Manage your profile
- Open the profile menu in the upper-right corner.
- Select Profile.
- Update your first name, last name, company, or job title/description.
- Select Save profile.
First name and last name are required. Company and job title are optional. When Microsoft Entra profile editing is configured, these values are saved in Testgrity and synchronised to your Microsoft Entra profile. The profile also shows your Testgrity user ID, which can help when requesting support. Workspace details and the workspace ID are available under Workspace.
If the fields are read-only, Microsoft Entra profile editing is not configured for the deployment. Contact your administrator if the identity details are incorrect.
Invite users to your workspace
- Open the profile menu in the upper-right corner and select Workspace.
- Select Invite user.
- In the invitation dialog, enter your teammate’s email address and choose Member or Administrator.
- Select Send invitation. Testgrity emails your teammate an Accept invitation link.
- Your teammate opens the link, signs in or creates an account using the invited email address, then selects Accept invitation.
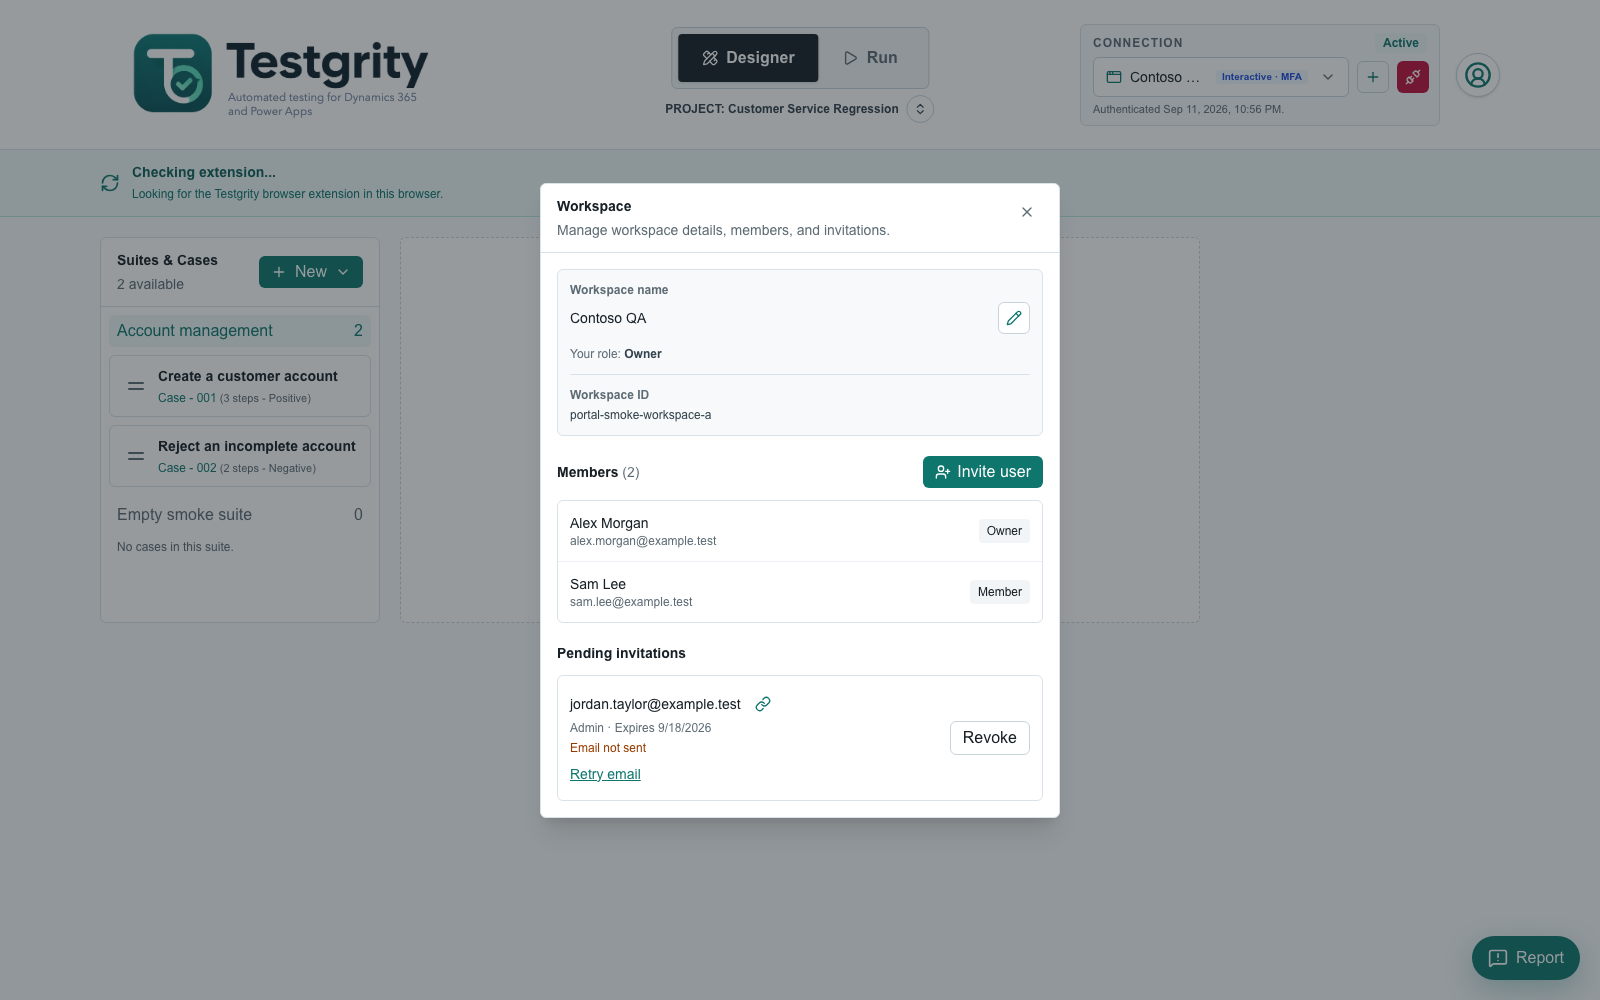
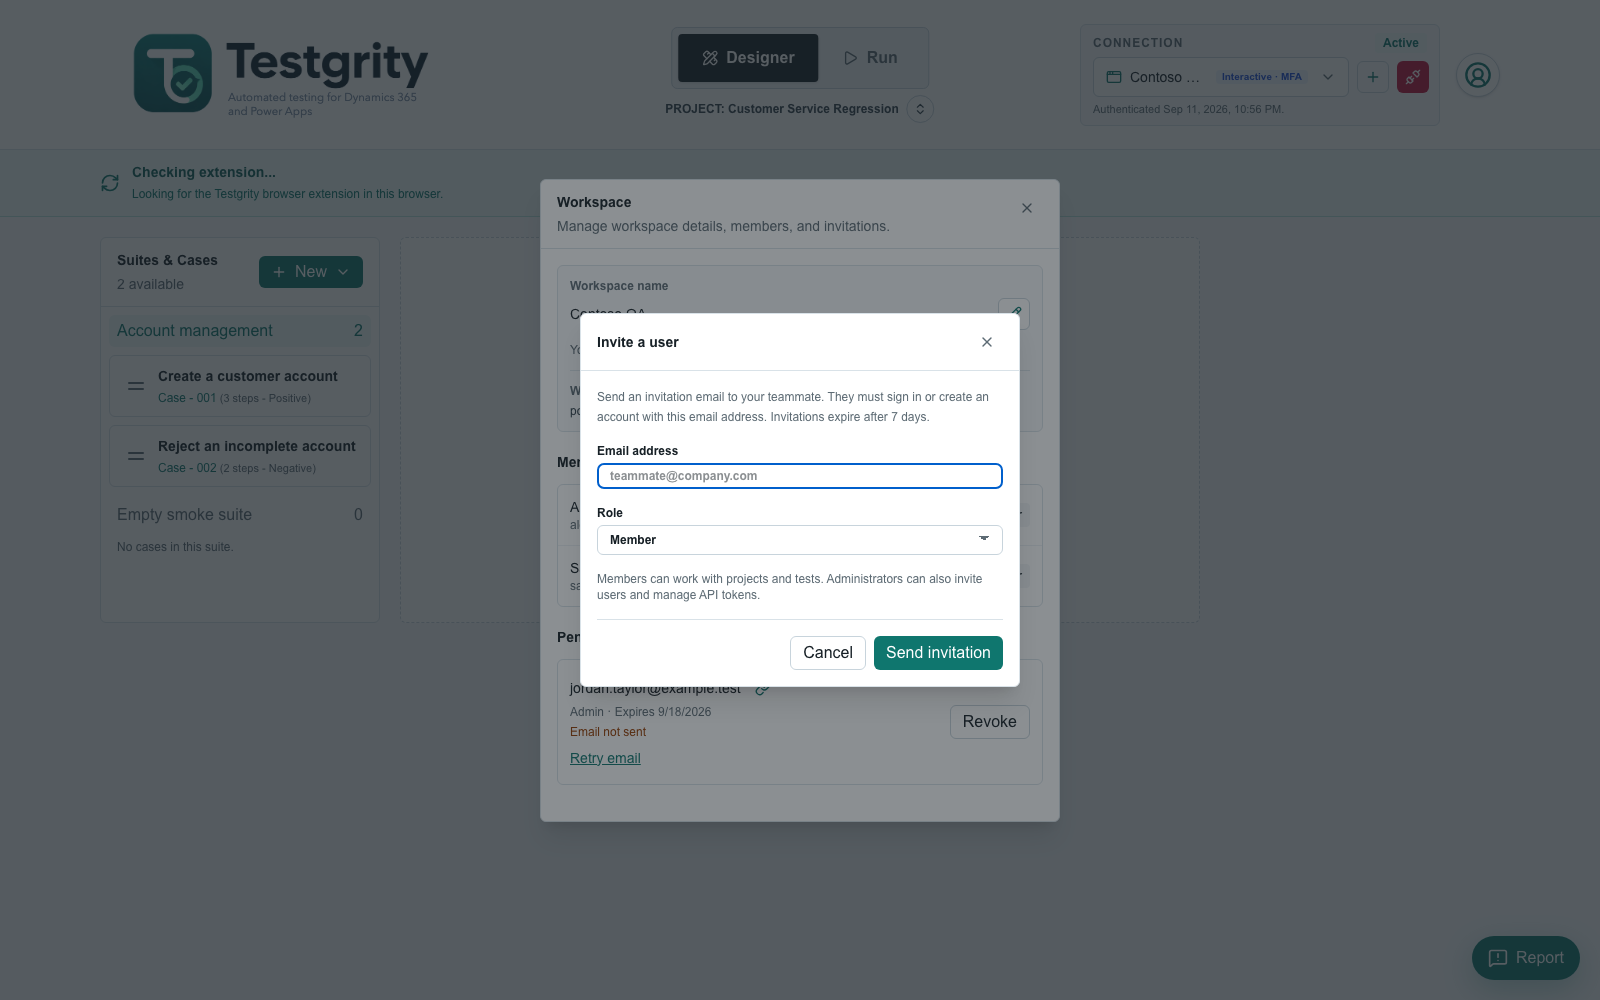
Only workspace owners and administrators can create and revoke invitations. Members can access the workspace’s projects, tests, connections, and runs; administrators can also invite users and manage API tokens. Invitations expire after seven days and can be accepted only once.
In Pending invitations, click the link icon beside an email address to copy its saved invitation link. Links remain available when you close and reopen Workspace. Email queued means the email service accepted the message for delivery. If sending fails, the invitation is still saved: select Retry email or copy the link to share it yourself. Older invitations created before links were saved must be revoked and recreated to make their links available.
The Workspace section shows the workspace name, your role, the workspace ID, members, and pending invitations. The role beside each member shows who owns or administers the workspace. Owners can select the edit button beside the workspace name, enter a new name, and select the save button. Each user can currently belong to one workspace, so no workspace switch control is displayed.
Workspace invitations require sign-in and PostgreSQL storage. An invitation does not bypass legal acceptance or private beta approval. If beta approval is pending, reopen the invitation after approval and signing in again.
Delete your account
Account deletion is permanent for Testgrity data:
- Open the profile menu and select Profile.
- Select Delete account.
- Review the deletion summary.
- Select Delete account permanently.
Testgrity deletes your profile and any workspace that you solely own, including its projects, tests, environments, results, saved authentication state, and stored run artifacts. Shared workspaces remain available to their other members.
Your Microsoft Entra identity is also deleted and can no longer sign in. An Entra administrator may be able to restore that identity for up to 30 days, but the deleted Testgrity data is not restored with it.
Account deletion is blocked while a test run in an affected workspace is queued or running. Cancel the run or wait for it to finish, then try again. If Testgrity asks you to sign in again or reports that account deletion is not configured, follow the prompt or contact your administrator.
Select or create a project
A project separates its suites, cases, environments, and results from other work.
- Select the round switch button beside the active project name below Designer and Run. You can also open the profile menu and select Projects.
- Select an existing project.
- To create one, select the icon-only New project button, enter a name and optional description in the separate dialog, and select Create project.
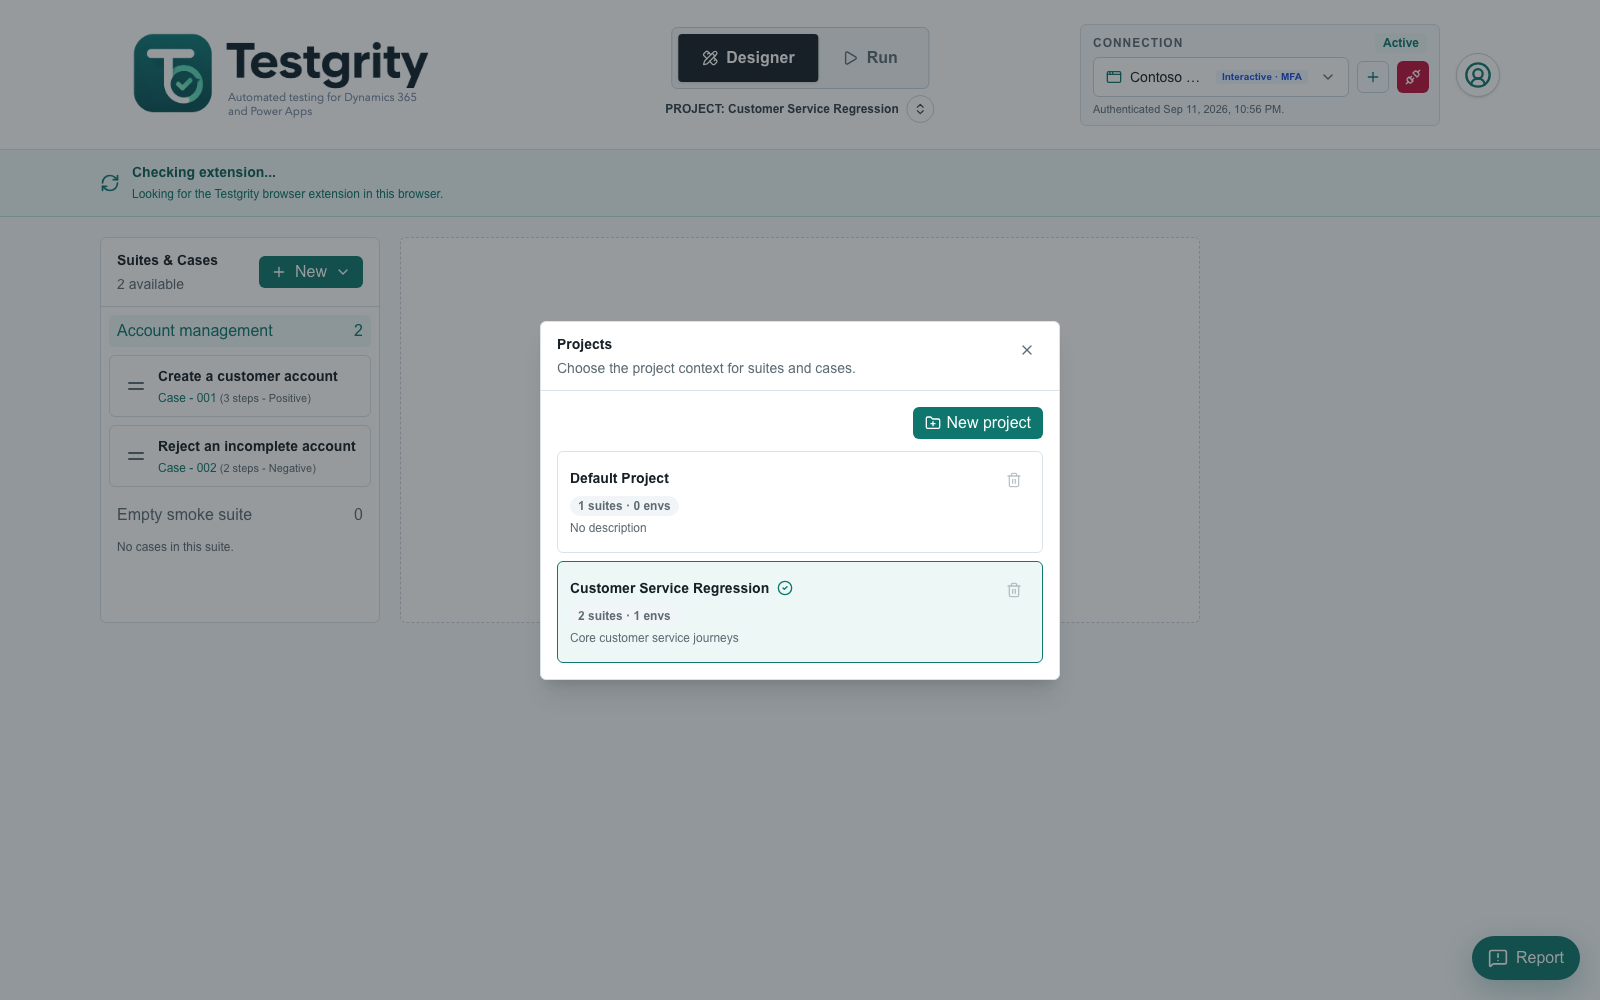
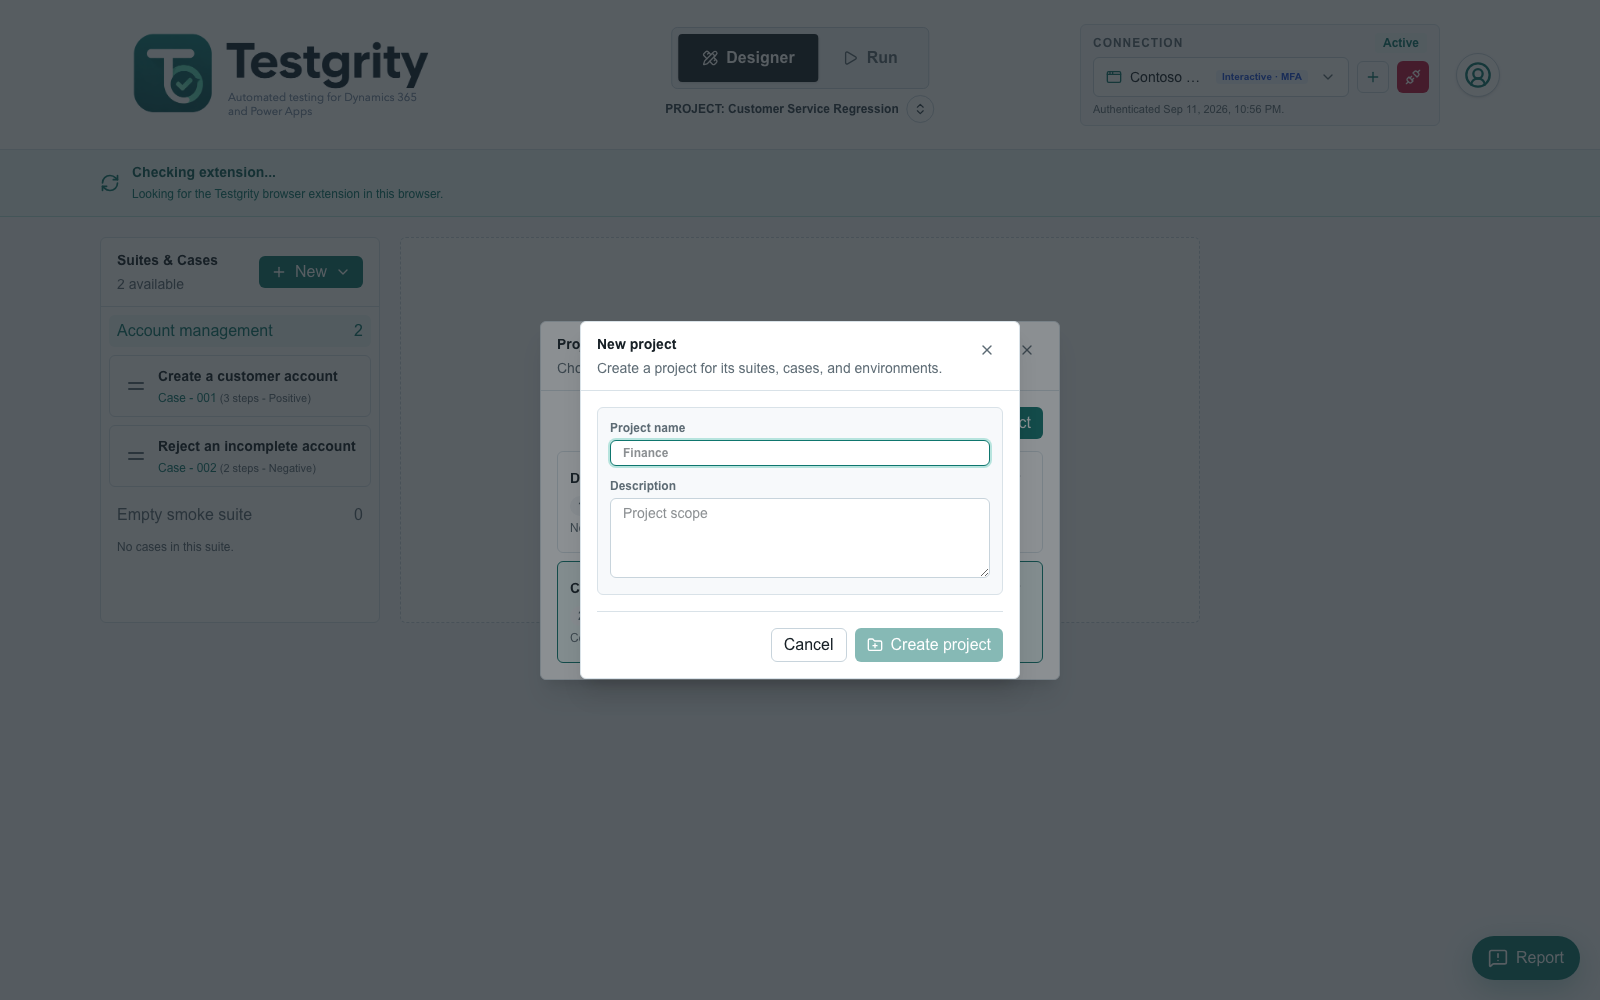
Testgrity saves the selected project for your user and workspace and restores it automatically when you sign in again. Projects do not have separate access levels: every member of the workspace can access its projects. A project can be deleted only when it is not the default project and contains no suites or environments.
Add an environment connection
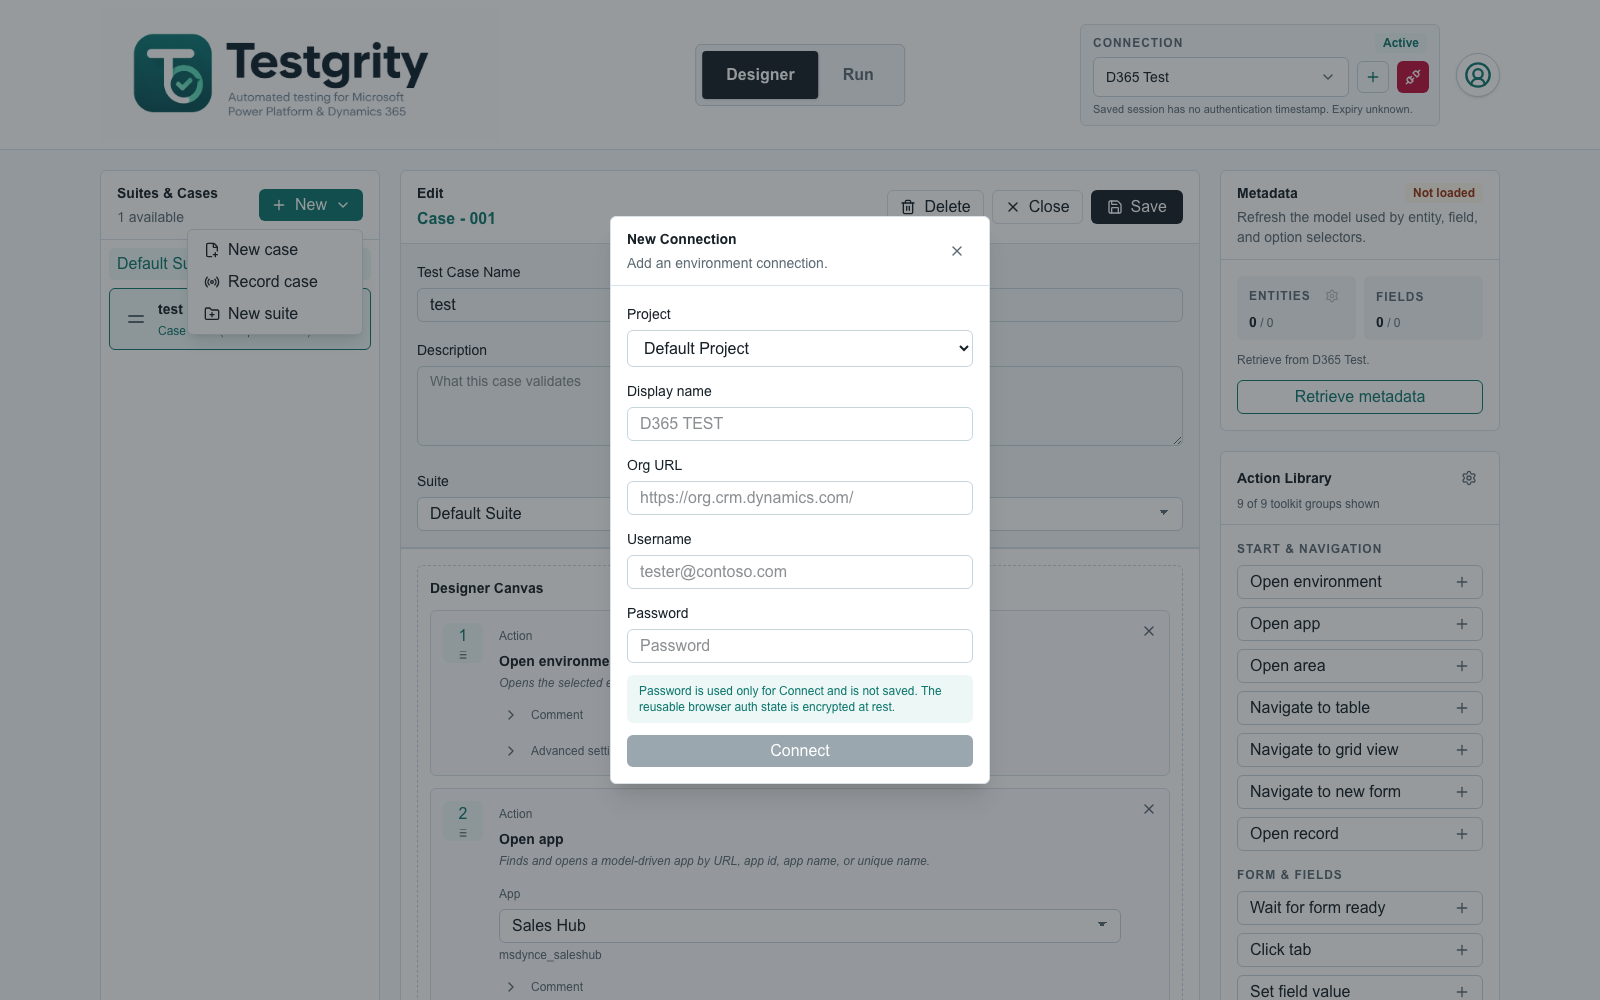
- In the header's Connection panel, select the cog to open Manage connections, then select Add connection.
- Select the project that owns the connection.
- Enter a display name and select the application type. Model-driven app is currently available; Canvas app and Power Pages site are shown as coming soon.
- Choose an authentication method:
- Interactive browser sign-in is recommended for MFA, passwordless sign-in, and Conditional Access. Enter the organisation URL, select Connect, and complete sign-in in the Chrome or Edge tab opened by the extension. Testgrity encrypts the captured D365 session for Browser or Background execution until Microsoft requires interactive authentication again; your password is not captured.
- Unattended automation account uses a dedicated test account without MFA. Enter the organisation URL, username, and password, then select Connect. Signs in automatically and creates an encrypted reusable session, so tests can run in the background.
Interactive connections use the extension to retrieve Dataverse apps, metadata, and choice values through the signed-in browser profile. When you save or reconnect an interactive environment, Testgrity automatically refreshes the metadata model in the background. Their encrypted session can also be used for Background execution. If Microsoft requires sign-in, MFA, or Conditional Access again, Testgrity stops the run and marks the connection as expired until it is reconnected in the browser. If the extension is not detected, Interactive browser sign-in is disabled and the connection dialog provides the extension download and installation instructions.
For unattended connections, the password is used only while connecting and is not saved. Testgrity saves an encrypted reusable browser session for Background execution.
Choose and manage connections
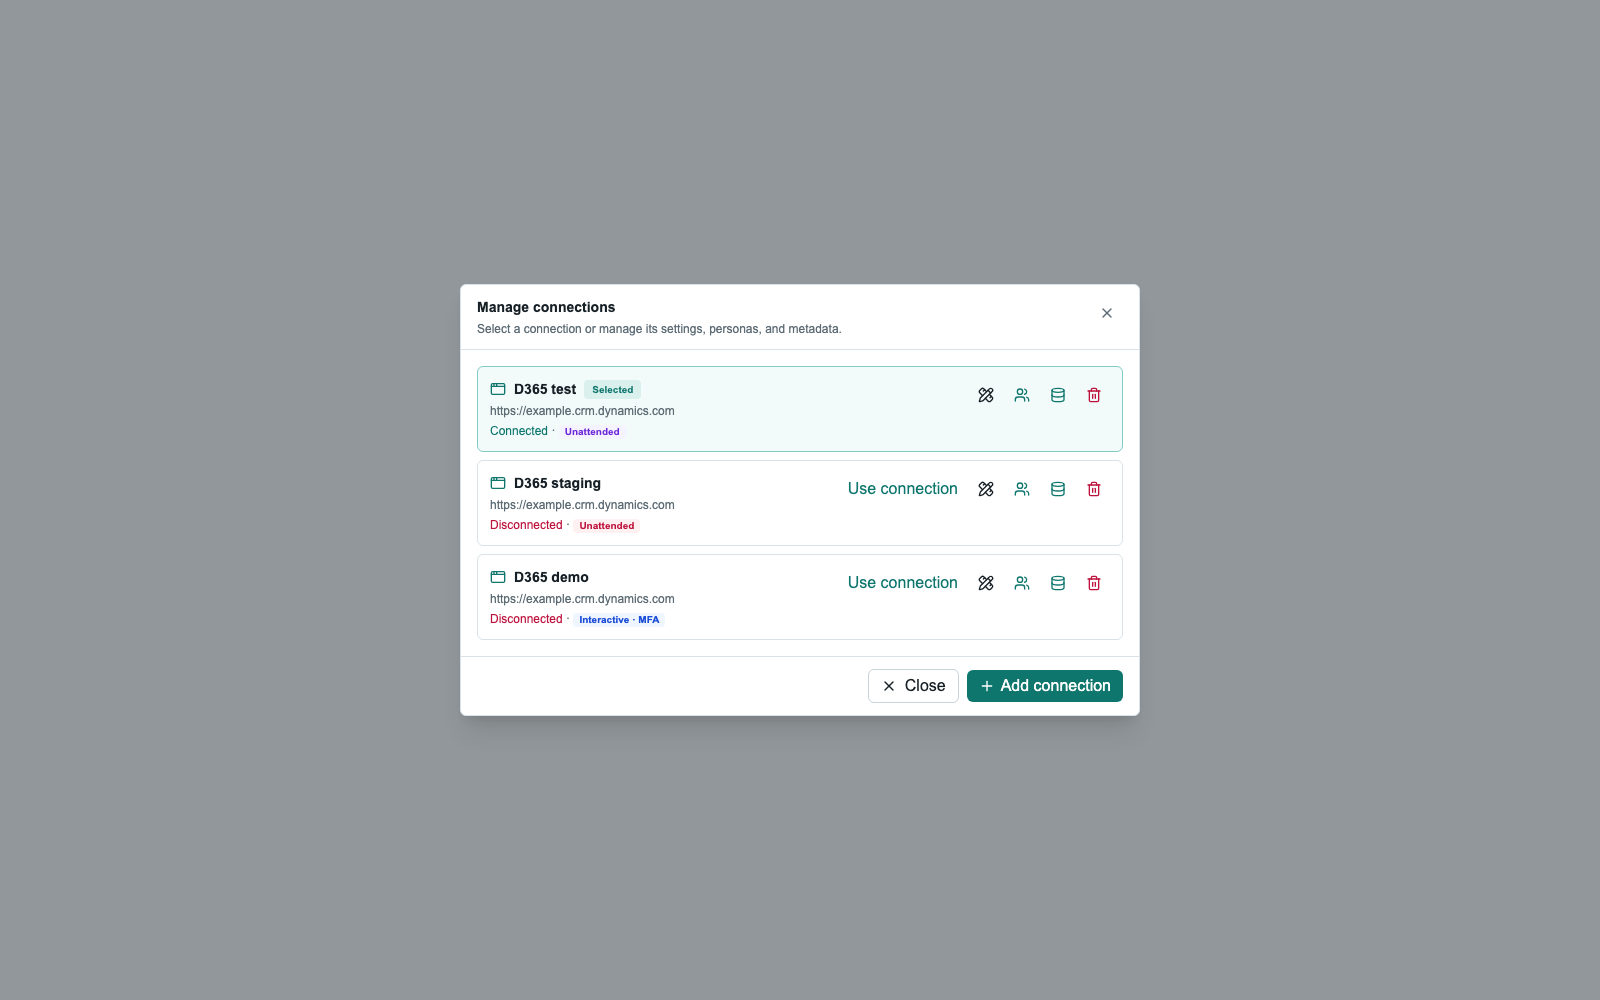
Use the selector in the Connection panel to choose an environment. Alternatively, select the cog to open Manage connections, then select Use connection on the required connection. The current connection has one Selected badge beside its name and a highlighted card. Selected identifies the environment used by your tests; it does not mean its saved sign-in is ready.
In Manage connections, each card shows its name, organisation URL, and a status line such as Connected · Unattended. The authentication method is displayed in a badge. In the closed selector and its list, the authentication-method badge appears beside the environment name.
When a saved session has a known expiry, the detail below the selector shows Expires followed by the expiry date and time. After that time it changes to Expired. The authentication timestamp and connection type are omitted from this summary because they are not needed to decide whether the connection is ready to use.
The Connection panel, selector list, and connection manager use the same status labels:
- Connected — the saved sign-in is ready to use. The status is green; the authentication-method badge is Interactive (blue) or Unattended (purple).
- Disconnected — a reusable sign-in is missing or has expired. The status text and status badges are red, matching report error colours. The Unattended badge also turns red; Interactive stays blue to distinguish the authentication method from connection status. Reconnect before using a runner that requires the saved session. For an expired connection, the manager's status tooltip explains that the saved sign-in has expired.
In Manage connections, use the pencil icon to edit or reconnect a connection, the people icon to manage personas, and the database icon to manage metadata. The red trash button deletes the connection after confirmation.
Add execution personas
A single environment connection can contain multiple execution personas for role-based tests. Select the cog beside Connection, then select the people icon for the required connection. In Manage personas, select Add persona, choose an enabled Dataverse user, give the persona a readable name, and authenticate that exact user. Testgrity shows the user's direct security roles for confirmation and stores a separate encrypted browser session; the password is used only during authentication and is not saved. Use the pencil icon when you need to edit or reconnect the connection itself.
In a test case's Details, select the required Execution persona. The default option continues to use the connection identity. Persona cases run in isolated sessions with Background execution. Browser execution uses the identity already signed in to the current Chrome or Edge profile, so it is unavailable for suites containing persona cases.
Deleting a persona clears it from linked test cases without deleting those test cases. If a persona's session expires, authenticate the persona again before running its cases.
Retrieve Dataverse metadata
Metadata powers the app, entity, field, and option selectors in test steps.
- Select the cog beside Connection.
- Select the database icon for the required connection.
- In Manage metadata, select Retrieve entity list.
- Wait for the progress indicator to finish.
- Optionally use the settings icon to choose which entities are included in selectors. Search for an entity, select or clear individual entities, or use Select all and Clear all. Changes are saved automatically when you close the entity selector.
Use Refresh model after relevant Dataverse customisations are published. The metadata dialog shows the number of selected and available entities and fields, the source environment, and when the model was last loaded.
To discard the cached model, select the trash button beside Refresh model and confirm the removal. This clears the cached metadata for that connection and switches supported steps to text fallback when it is active. Select Retrieve entity list to load the model again.
During an application update
Testgrity administrators promote a tested application release through TEST, UAT, and PROD. The application may restart briefly while the approved release is applied.
- Avoid starting a long suite during a communicated maintenance window.
- A normal application deployment preserves projects, environment connections, suites, cases, run history, and retained artifacts.
- If Testgrity was open during the update, refresh the browser after the administrator confirms that deployment is complete.
- If a page continues to show an error after refreshing, use Report or contact the administrator with the environment name and approximate time.
Report an issue or provide feedback
If reporting is enabled for your deployment, a floating Report button appears in the lower-right corner of authenticated pages.
- Select Report.
- Choose Report an issue or Provide feedback.
- Enter a short title and description. For an issue, explain what happened, what you expected, and how to reproduce it. For feedback, describe what works well, what could be improved, or what you would like to see.
- Optionally paste, drag and drop, or choose up to three PNG, JPEG, or WebP screenshots.
- Review every screenshot and remove credentials, customer data, and other sensitive information.
- Select Create.
Each screenshot must be 5 MB or smaller, and all screenshots together must be 10 MB or smaller. After submission, Testgrity confirms whether the issue report or feedback was submitted, shows the GitHub issue number, and provides a View on GitHub link.
The button is hidden when reporting is disabled. If it is enabled but the GitHub connection is incomplete, the dialog explains that setup is required; contact your administrator.
Next step
Continue to Designing tests.